Setting up a Pi-hole
Having found a spare Pi Zero, I wanted to put it to good use. I had been thinking about setting a network-wide advert and tracking blocker and looking at any DNS cache possibilities to speed up my internet access. I also wondered if there was a good way to view what internet traffic was coming in and out of my network. All good reasons to try setting up a Pi-hole!
The setup of the Pi-hole on the Zero itself was fairly straightforward. I was looking at the Docker container route, but seeing as it was a new Zero installation I chose the traditional route of install straight from the command line.
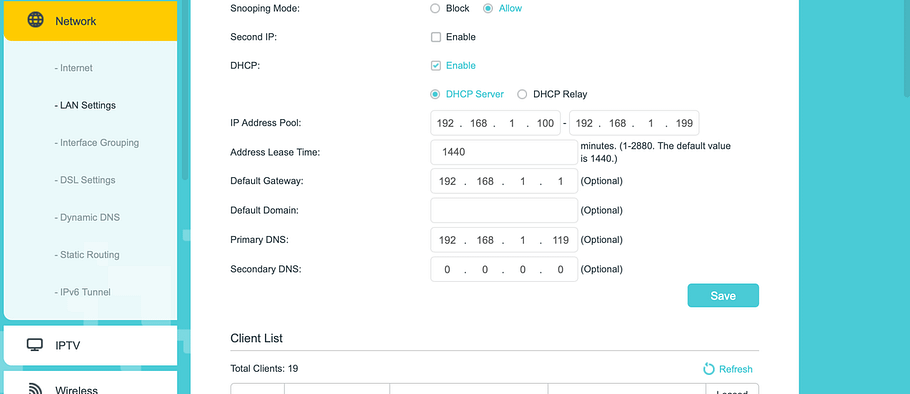
The only real trial and error part of the install was changing the Primary DNS server in my Archer VR600 router. After reading through a few forums and a bit of trial and error I found the Primary DNS entries under the Advanced > Network > LAN Settings. The following screenshots shows my setup. My Pi-hole is on 192.168.1.119 (I did have to do a few reboots of the router for it to take hold).

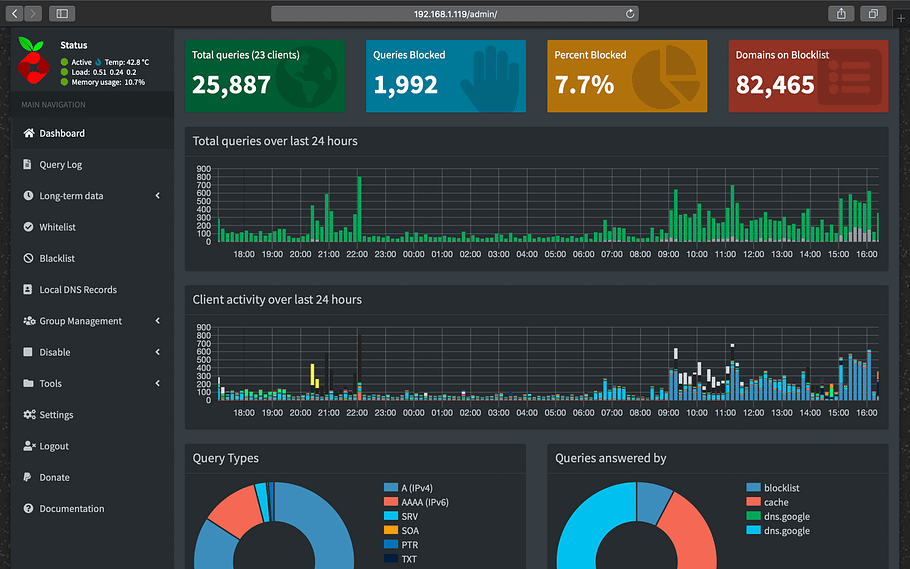
The Pi-Hole’s been running now for a few weeks and it seems to be catching roughly 10% of all traffic as adverts.

It’s interesting to see the traffic breakdown, and the times of day that I use the internet the most. Still to try is the DNS cache facility, plus grouping my devices under the group management facility (e.g. home automation, laptop, Raspberry Pi).


 https://orcid.org/0000-0002-5874-5019